Sending bulk emails with Mailgun lists
Beyond transactional emails, sometimes we need to send generic emails to all users or a segment of users. The way this is mostly done is to use email marketing services like MailChimp. For something custom, one option is to send to the emails one after the other using a loop, or a queue. But an even easier way to go is to use Mailgun Mailing Lists.
Mailgun Mailing Lists allow you create an email address you can subscribe members to. Any email sent to the address will then be sent to each subscribed member.
Creating the Mailing List
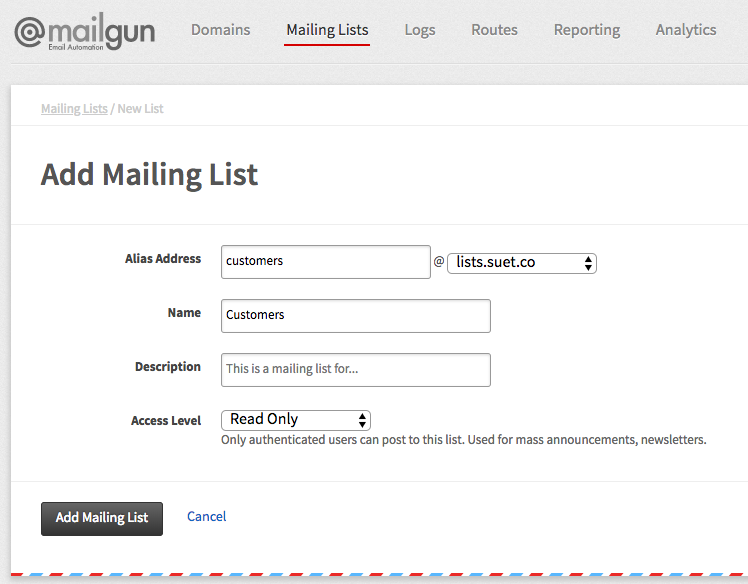
Let’s start by creating our example mailing list. We can do this from the dashboard or Mailgun API.
Notes:
- It is important to leave the access level at read only. This ensures that only you can send mail to the list through the API.
- Your domain’s MX records must point to Mailgun so that Mailgun can receive and process emails sent to the alias address (the Mailing List email address). If you are using another email provider for your emails, you can create a separate subdomain and use that for your Mailing List.
Adding Members
Now that we have our Mailing List, we can start adding members.
Endpoint: https://api.mailgun.net/v3/lists/{address}/members
Method: POST
Authentication: HTTP Basic (api as username, API Key as password)
Parameters:
address: email address, e.g.Alice <alice@example.com>oralice@example.comname: Member name. Optional.vars: JSON-encoded dictionary string with arbitrary parameters, e.g.{"gender":"female","age":27}subscribed:yesto add as subscribed (default),noas unsubscribedupsert:yesto update member if present,noto raise error in case of a duplicate member (default)
You will want to automatically do this from your app when the necessary event is triggered. If for example your list is targeted at your paid subscribers, you will want to call the Add Member API once a payment event is triggered on your site.
stripe.charges.create({
  amount: charge * 100,
  currency: 'usd',
  customer: user.customer.id
}, (err, charge) => {
  // Error and charge checks
  // ...

  // Subscribe user to list
  request.post({
    url: 'https://api.mailgun.net/v3/lists/customers@lists.suet.co/members',
    gzip: true,
    auth: {
      user: 'api',
      pass: 'secretpassword',
      sendImmediately: false
    },
    form: {
      address: user.email
    }
  }, (err, response, body) => {
    // Checks
    // ...
  });
})
You can also add existing users to the list using the bulk upload option under Mailing List in the Mailgun Dashboard.
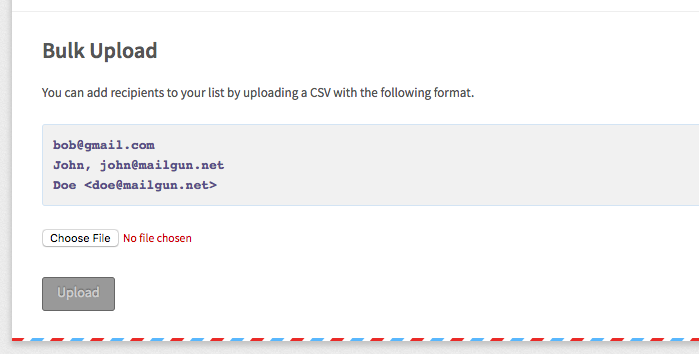
Or use the bulk insert API.
Endpoint: https://api.mailgun.net/v3/lists/{address}/members.json
Method: POST
Authentication: HTTP Basic (api as username, API Key as password)
Parameters:
members: JSON-encoded array. Elements can be either addresses, .["bob@example.com", "alice@example.com"], or JSON objects, e.g.[{“address": "bob@example.com", "name": "Bob", "subscribed": false}, {"address": "alice@example.com", "name": "Alice"}]. Custom variables can also be provided, e.g.[{"address": "Bruce <bruce@jl.dc>", "vars": {"superpower": "money"}},{"name": "Barry", "address": "barry@jl.dc", "vars": {"superpower": "speed"}}]. 1000 emails per call.upsert:yesto update member if present,noto raise error in case of a duplicate member (default)
// ...
// users => array of retrieved users from db

let chunk = [];
while(users.length) {
  chunk.push(users.splice(0, 1000));
}

Promise.all(chunk.map(d => {
  return new Promise((resolve, reject) => {
    request.post({
      url: 'https://api.mailgun.net/v3/lists/customers@lists.suet.co/members.json',
      gzip: true,
      auth: {
        user: 'api',
        pass: 'secretpassword',
        sendImmediately: false
      },
      form: {
        members: JSON.stringify(d)
      }
    }, (err, response, body) => {
      // ...
      return resolve();
      // Or reject() depending or response
    })
  })
}))
.then(() => {
  // ...
}).catch(reason => {
  // ...
})
Removing Members
There are two ways to remove people from our list. One is to delete them. This completely removes them from the list. The other is to unsubscribe them. They will still remain in the list but emails sent to the list will not be sent to them. Let’s take a look at both options. We will be completely deleting them when they no longer fit our segment (in this case, when they are no longer a paid user) and will let them unsubscribe if they are no longer interested in the mails we send.
Let’s start with deleting the user.
stripe.customers.del(user.customer.id, (err, status) => {
  // Error and checks
  // ...

  // Remove user to list
  request.delete({
    url: `https://api.mailgun.net/v3/lists/customers@lists.suet.co/members/${user.email}`,
    gzip: true,
    auth: {
      user: 'api',
      pass: 'secretpassword',
      sendImmediately: false
    }
  }, (err, response, body) => {
    // Checks
    // ...
  });
})
For canceling subscriptions, we can include the unsubscribe variable %mailing_list_unsubscribe_url% in our mail. This will be replaced with an unsubscribe link by Mailgun and Mailgun will handle the rest. We can as well create a custom unsubscribe page we can link to from our mail. Within our email, our unsubscribe link will look like this http://domain.tld/unsubscribe/%recipient_email%. The %recipient_email% variable will automatically be replaced with the user’s email.
// An express route
app.get('/unsubscribe/:email', (req, res) => {
  let email = req.params.email;

  request.put({
    url: `https://api.mailgun.net/v3/lists/customers@lists.suet.co/members/${email}`,
    gzip: true,
    auth: {
      user: 'api',
      pass: 'secretpassword',
      sendImmediately: false
    },
    form: {
      subscribed: 'no'
    }
  }, (err, response, body) => {
    // Checks
    // ...

    res.send('You have been successfully unsubscribed :(');
  });
})
Sending the mail
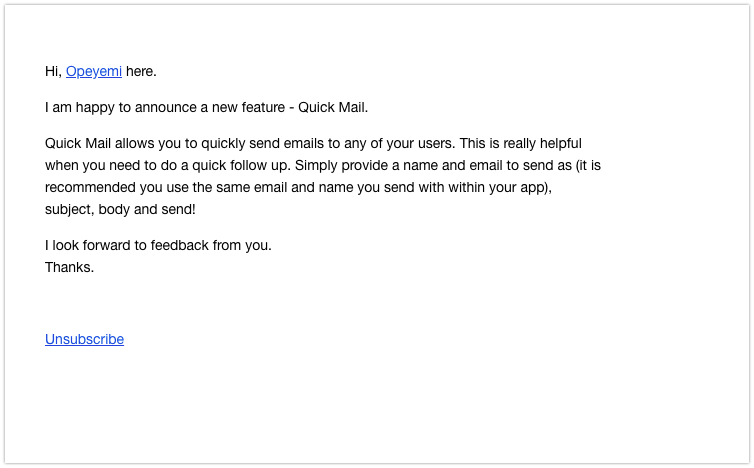
Because our list’s access level is read-only, the only way to post to it is through the API. Let’s create a test mail. It can be a simple text email.
Hi, Opeyemi here.

I am happy to announce a new feature - Quick Mail.

Quick Mail allows you to quickly send emails to any of your users. This is really helpful when you need to do a quick follow up. Simply provide a name and email to send as (it is recommended you use the same email and name you send with within your app), subject, body and send!

I look forward to feedback from you.
Thanks.

%mailing_list_unsubscribe_url%
Or a simple HTML template.
request.post({
  url: 'https://api.mailgun.net/v3/lists.suet.co/messages',
  auth: {
    user: 'api',
    pass: process.env.EMAIL_KEY
  },
  sendImmediately: false,
  form: {
    from: process.env.EMAIL_FROM,
    subject: 'New feature: Quick Mail',
    html: html, // Content of our html template
    to: 'customers@lists.suet.co', // Our list address
    text: text // Text version of our email
  }
}, (err, response, body) => {
  // Status and checks
});
Tracking deliveries, opens and clicks
You can easily track email deliveries, opens and clicks from the Mailgun dashboard. If you use Suet, this will also be available on your Suet dashboard.
Conclusion
Using a mailing list makes it easy to send bulk emails to your users. The interesting part is you can create multiple lists and segment your users into them.