[Building Engage] #1. Designing a better contact CSV upload
When designing Engage’s contact CSV upload, the top thing on my mind was flexibility. Users shouldn’t be forced to create their CSV files in a certain way. Upload your CSV file as it is, select the columns you need from it and map it to customer attributes.
It was a good idea. But there were two things we missed that became an issue down the line.
Issue 1: What delimiter?
Even though the C in CSV stands for comma, the character for separating fields, this is not always the case. Some CSV files use other characters like semicolon (;), tab (\t), and pipe (|) as delimiters.
Alternative delimiter-separated files are often given a .csv despite the use of a non-comma field separator. This loose terminology can cause problems in data exchange.
The CSV parser we originally used rightly assumed comma as the default delimiter for CSV files uploaded. This is not always the case. And when users upload such files with a different delimiter the parser throws an error.
There are two ways to solve this. One is to tell users that the uploaded CSV file must be comma-separated. However, how many users know how to fix this if it’s not comma-separated?
The other way is to let users type or select the delimiter character. If they do, we can pass the delimiter to our parser so that it can be used instead of comma. But then we will be assuming users know how to detect the file delimiter. Most do not. (The way to do this is to open the file with a text editor and check).
What if we can support multiple delimiters? That solves this. And this was what we did. We switched CSV parser to one that supports multiple delimiters. This means we can support comma, semicolon, tab and other common types. Once the file is uploaded, the parser automatically detects the delimiter and parses the file based on that.
Issue 2: Headers and duplicate header values
The original flow was this:
- User uploads file.
- We get the CSV header (the first row that serves as the column titles) and the next row. That next row is what we show as preview of the CSV data. We call this the preview row. At this point of the process, we don’t need the rest of the CSV data. We just need the header and a preview row to allow people to select the columns they want, see a preview of the data and map the column to the choice customer attribute.
- We transform this to an object that maps the headers as keys and the preview row as values.
Let me explain with an example. If the uploaded CSV file has the data (space added after the comma for legibility):
First name, Last name, Email
Opeyemi, O., ope@engage.so
John, Doe, john@doe.email
The process transforms that into this:
{
  "First name": "Opeyemi",
  "Last name":"O.",
  "Email": "ope@engage.so"
}
That object is what we then use for the magic here:
In theory, this works. But there are two flaws. One, what happens if there are no headers? Not all CSV files include one. What if a user uploads this instead:
Opeyemi,O.,ope@engage.so
John,Doe,john@doe.email
Our view then becomes this:

Hmmm…bad but maybe not so bad. The user can still somehow use this. However, because we already assumed a header row, that first row will be skipped during the actual import. In order words, every file without a header will have its first row not uploaded.
There is one more problem. Besides assuming the CSV file should have a header row, the parser expects the rows to have unique values. Header rows mostly have unique values but not so with data rows.
Take this file for example:
Opeyemi,,ope@engage.so,,Engage
John,Doe,john@doe.email,Google,Acme
This will throw an error because the first row (the assumed header row) has two values that are the same thing — the empty value in the second and fourth columns.
How can we solve this? Well, we can start by using a parser that doesn’t throw an error for duplicate header values. That solves a part of the problem but duplicate values will mean that our transformed object becomes this:
{
  "Opeyemi": "John",
  "":"Google",
  "ope@engage.so":"john@doe.email",
  "Engage":"Acme"
}
Instead of this:
{
  "Opeyemi": "John",
  "":"Doe",
  "ope@engage.so":"john@doe.email",
  "Engage":"Acme"
  "":"Google",
}
This is because objects can’t have duplicate keys, so that last empty key will overwrite the other.
This is an easier problem though. Instead of using objects, we can use two different arrays for the header row data and the preview row data.
header = ['Opeyemi', '', 'ope@engage.so', '', 'Engage']
preview = ['John', 'Doe', 'john@doe.email', 'Google', 'Acme']
Improving the experience
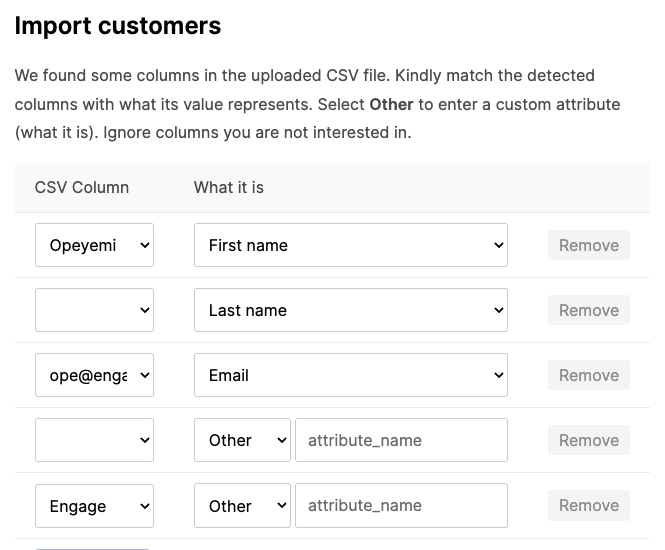
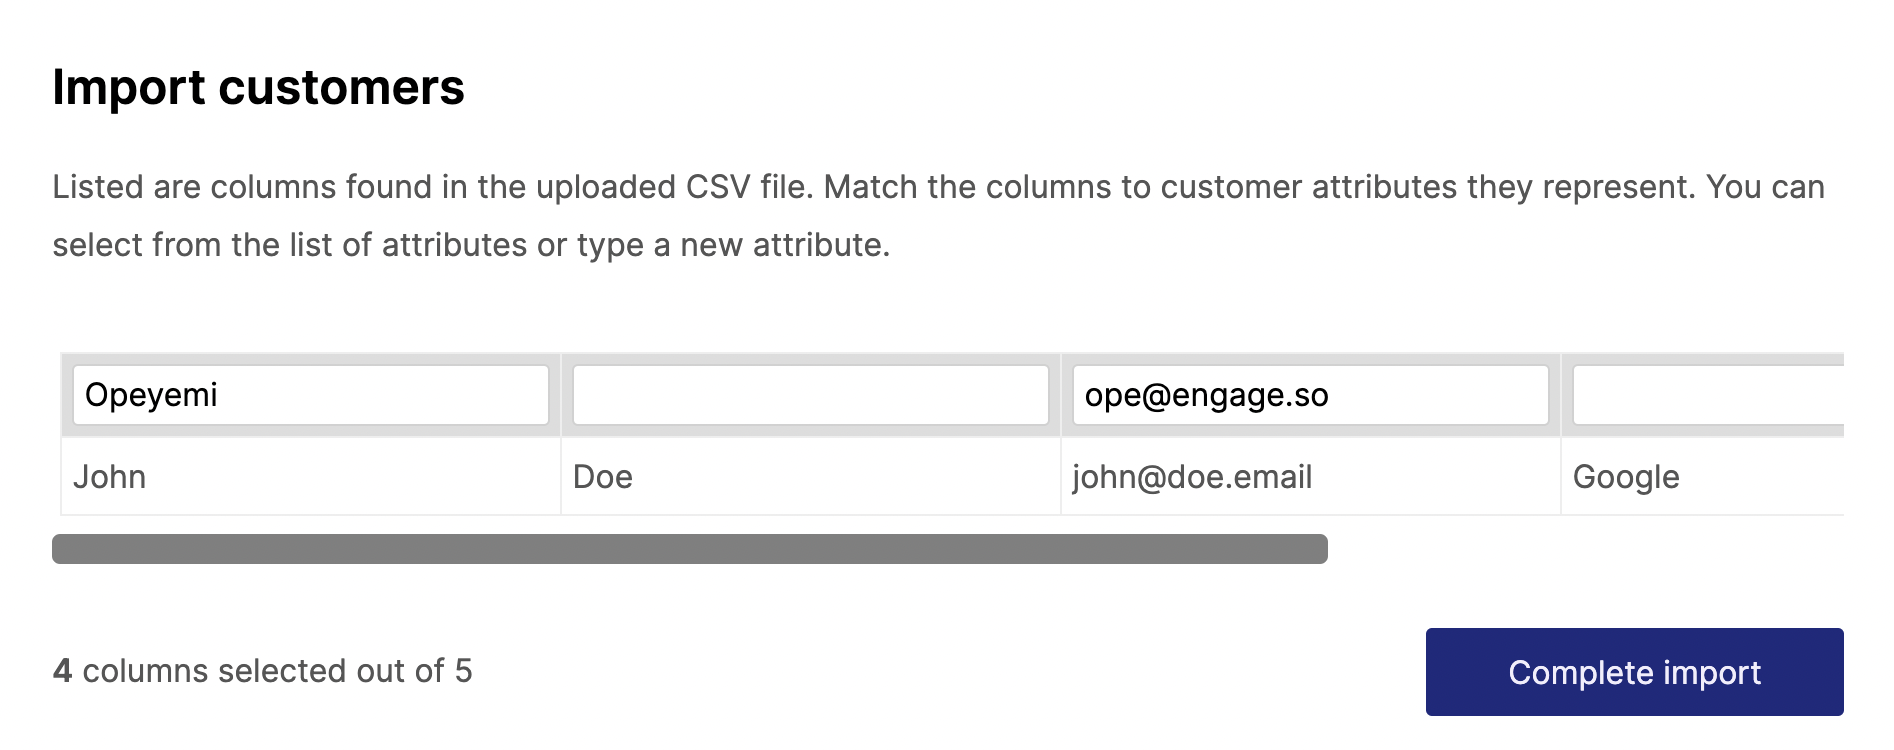
When there are multiple empty “header” values, the experience feels off.
![]()
Instead of adding the rows one by one as needed, we can list everything.
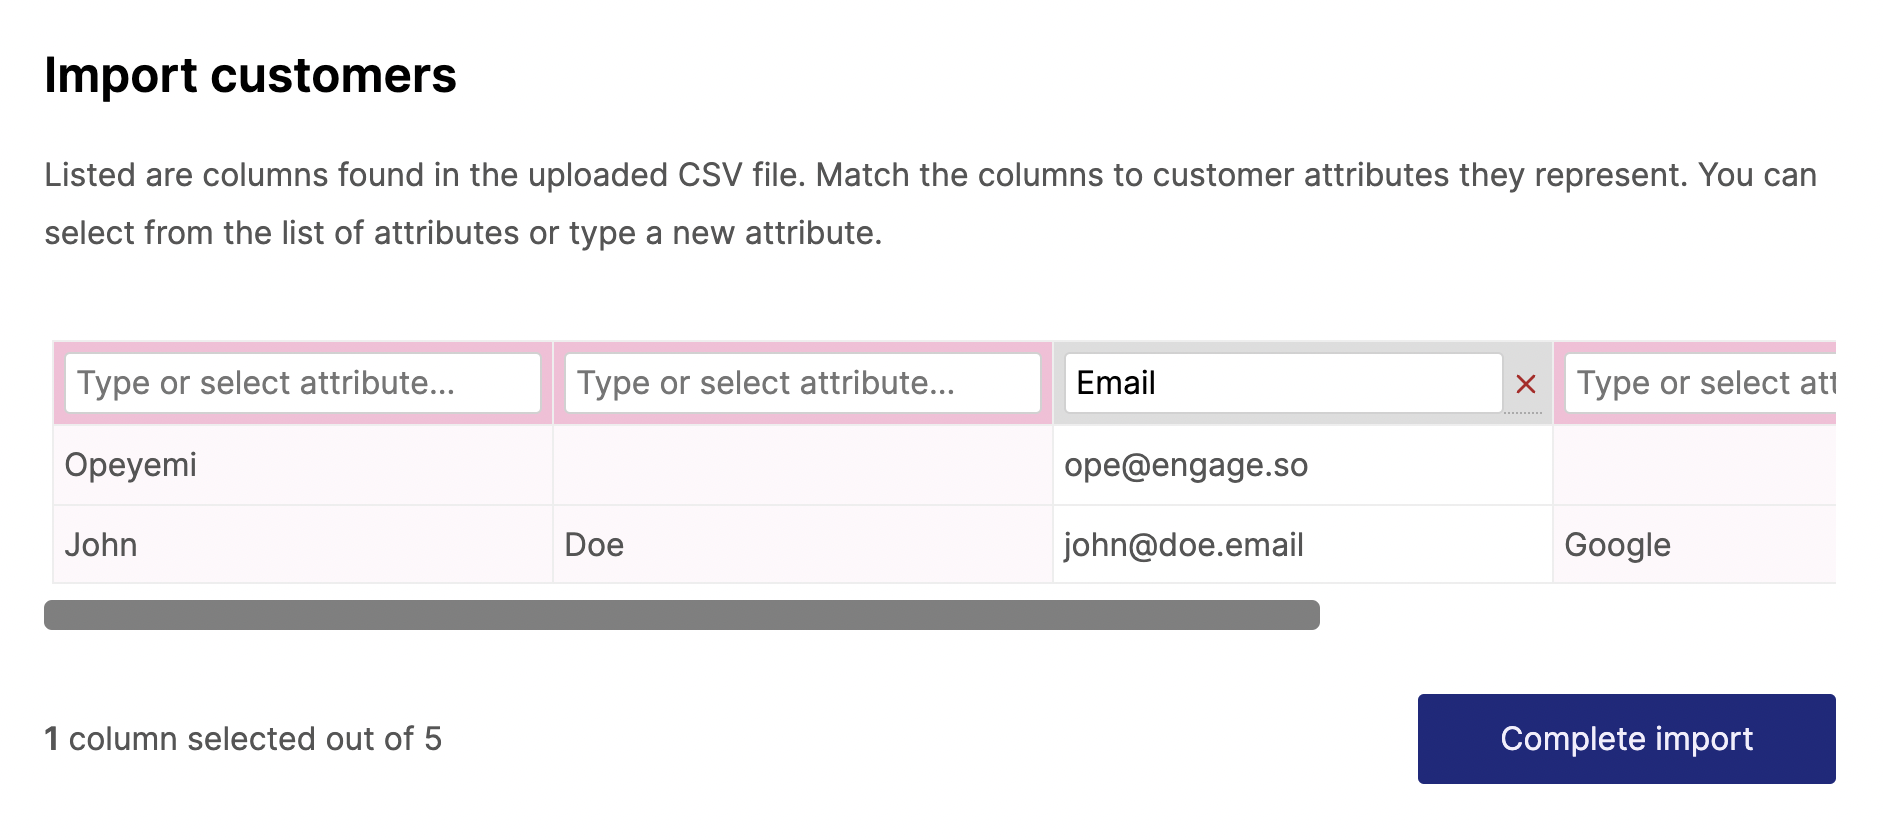
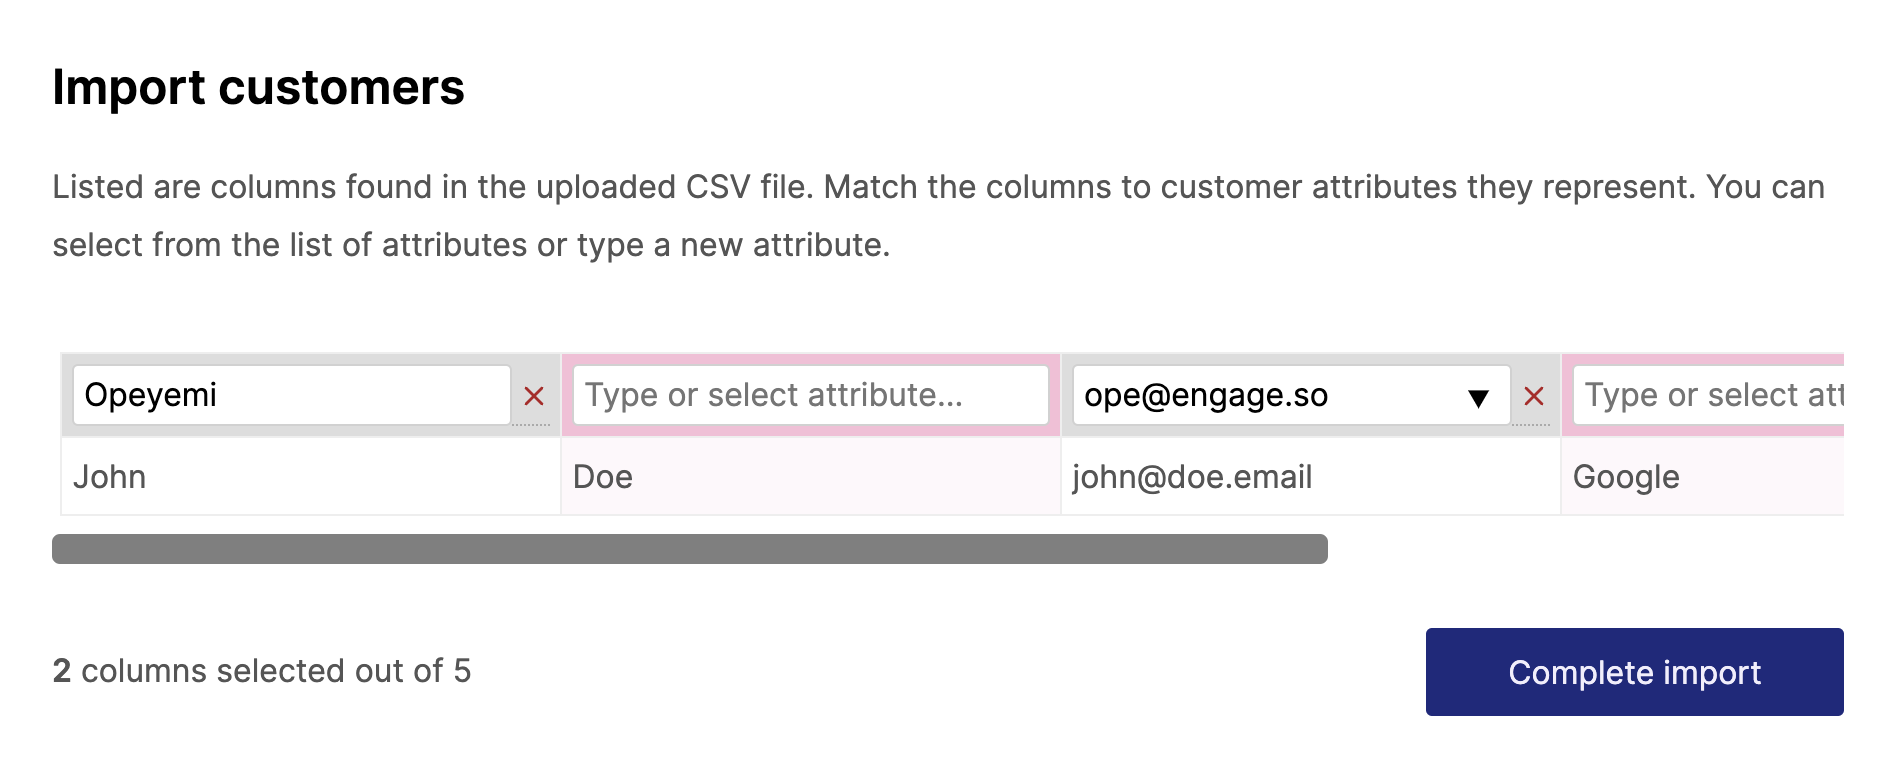
It still doesn’t look good enough. We are displaying header values down the column instead of the conventional way of across a row. That can be fixed to this:
It also means we can have more than one preview row. We can also colour code columns that are yet to be mapped and add a way to “unmap” the selected columns.
Autodetecting headers
Even though we have solved the user experience part of the missing header problem, we still need to know if the file has a header or not. This is to know if we should not import that first line when doing the final file upload or not.
There is no foolproof way of doing this. Well, maybe with some machine learning. In our case, we deduced the first row is a header based on some assumptions:
- Does it have unique values?
- Does the value include at least one of some header values (email, first[\s_]?name, last[\s_]?name…)
If we detect some values in the headers, we can preselect the columns in the selection view